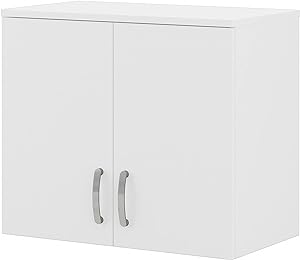
Creating a custom bar cabinet is a rewarding project for any DIY enthusiast or homeowner looking to add a touch of sophistication and functionality to their living space.Constructing a Custom Bar Cabinet Not only does it serve as a focal point for entertaining guests, but it also provides organized storage for your wine, spirits, and glassware. This guide will walk you through the process of constructing a bar cabinet from start to finish.
1. Planning Your Design
The first step in building a custom bar cabinet is to decide on the design and dimensions. Consider the space where the cabinet will be located and how it will be used. Do you prefer a traditional, modern, or rustic look? How many bottles and glasses do you need to store? Answering these questions will help you sketch a blueprint or find a suitable plan online that meets your needs and aesthetic preferences.
2. Gathering Materials and Tools
Once you have your design, compile a list of materials and tools you’ll need. This list typically includes wood (plywood or solid wood, depending on your preference and budget), screws, hinges, a handle or knob, and a finish (paint, stain, or varnish). For tools, you’ll need a saw (hand saw, circular saw, or miter saw), drill, screwdriver, sandpaper, and a measuring tape. Don’t forget safety equipment like gloves and goggles.
3. Cutting and Assembling the Frame
Based on your design, start by cutting the wood to create the frame of your bar cabinet. This includes the sides, top, bottom, back, and any internal dividers. Assemble the frame using screws or nails, ensuring all corners are square and the structure is sturdy. If your design includes doors, cut these pieces to size as well.
4. Adding Shelves and Dividers
Determine the layout of your shelves and dividers based on what you plan to store. For wine bottles, you might consider diagonal or horizontal racks. Use your drill and screws to secure the shelves and dividers in place. Ensure they’re evenly spaced and firmly attached.
5. Installing Doors and Hardware
If your cabinet has doors, attach the hinges to the doors first, then to the cabinet frame, ensuring they’re aligned and the doors open smoothly. Install the handle or knob on the door front. For a more sophisticated look, consider adding glass panels to the doors or installing lighting inside the cabinet.
6. Finishing Touches
Sand the entire cabinet to smooth out any rough edges or surfaces. Apply your chosen finish according to the product’s instructions. Paint allows for a wide range of colors and styles, while stain and varnish showcase the wood’s natural beauty. Apply several coats for durability, sanding lightly between coats for a smooth finish.
7. Accessorizing and Organizing
Once your bar cabinet is dry and ready, it’s time to accessorize and organize. Install wine glass holders under a shelf for an elegant display, or add a rack for hanging stemware. Use drawer organizers or small baskets inside the cabinet to keep bar tools and accessories tidy. Fill your cabinet with your favorite spirits, wines, and glassware, arranging them in a visually appealing way.
8. Maintenance and Care
To keep your bar cabinet looking its best, clean it regularly with a soft, damp cloth. Avoid using harsh chemicals that can damage the finish. If the cabinet is made of wood, consider reapplying a coat of finish or polish annually to protect the surface and maintain its luster.
Constructing a custom bar cabinet is a project that combines craftsmanship with creativity. Not only does it enhance the aesthetic appeal of your home, but it also serves as a testament to your DIY skills and personal style. Whether you’re a seasoned woodworker or a novice, the process of building a bar cabinet from scratch is a fulfilling endeavor that results in a unique and functional piece of furniture.
